💣 Turkish Get-Up Workshop

One kettlebell. Seven distinct stages. A continuous test of strength and control. Learn to navigate the Turkish Get-Up’s challenging transitions, maintain overhead stability and coordinate your entire body through practical drills, technical corrections and progressive training.
📝 Introduction
One kettlebell. Multiple transitions. Complete control from floor to standing.
The Turkish Get-Up (TGU) is one of kettlebell training’s most technically demanding movements. Unlike ballistic exercises such as the swing, clean and snatch, the Get-Up emphasises controlled strength as the athlete moves from lying on the floor to standing upright, then reverses the sequence while maintaining a kettlebell overhead.
The challenge lies in coordinating several distinct transitions. Each changes the body’s support points, balance requirements and muscular demands, requiring more than the strength to simply hold a weight above the shoulder.
The result is a demanding exercise that combines overhead stability, coordinated movement, mobility and whole-body strength.
This workshop breaks down the single-arm Hardstyle Turkish Get-Up, using the low-sweep technique. From the initial setup to the final return of the kettlebell, you’ll learn the mechanics, coaching cues, corrective drills and progressions needed to develop a controlled, repeatable movement.
🎯 Purpose & Foundations
The Turkish Get-Up combines unilateral overhead loading with a series of controlled floor-to-standing transitions.
Rather than developing one muscle group or movement pattern in isolation, the exercise challenges the athlete to generate force, maintain balance and coordinate the entire body as its position changes.
Its principal training benefits include:
What Does the Turkish Get-Up Develop?
| Training Quality | Primary Benefit |
|---|---|
| Overhead Stability | Develops control of a kettlebell through changing body positions |
| Core Stability | Challenges trunk bracing and control of unwanted rotation and lateral movement |
| Mobility | Requires controlled movement through the shoulders, thoracic spine and hips |
| Coordination | Develops precise sequencing between the upper body, trunk and lower limbs |
| Balance & Body Awareness | Challenges control as the body's centre of mass and support points change |
| Transitional Strength | Develops strength when moving between lying, seated, kneeling and standing positions |
| Unilateral Strength | Challenges the body to manage an asymmetrical load through coordinated movement |
These qualities work together throughout the Get-Up. The objective is not simply to achieve each position, but to move between them without losing control.
💣 Click on links below for more.
💪 Primary Muscles Involved
The Turkish Get-Up recruits numerous muscle groups, although their relative contributions change throughout the movement.
The deltoids, rotator cuff and scapular stabilisers, including the trapezius and serratus anterior, help maintain overhead shoulder control. The triceps support elbow extension, while the forearm muscles contribute to wrist and grip stability.
The abdominals, obliques and spinal erectors coordinate trunk movement, providing stability during rotation, lateral weight transfer and the transition towards standing.
The glutes, quadriceps, hamstrings and hip stabilisers contribute to the hip lift, kneeling recovery, standing ascent and controlled descent.
The supporting arm and shoulder also play an essential role. During the floor transitions, they provide a stable connection with the ground, allowing the athlete to transfer body weight and reposition the torso.
The defining feature of the Get-Up is how these muscle groups coordinate through successive movement phases, rather than the contribution of any single muscle.
⚙️ Mobility, Stability and Movement Control
A successful Get-Up requires three closely related qualities.
Mobility allows the athlete to reach the necessary positions. The shoulders require sufficient overhead range, the thoracic spine must accommodate controlled rotation, and the hips must permit the leg sweep and kneeling transitions.
Stability allows those positions to be maintained under load. The working shoulder supports the kettlebell, the trunk manages changing forces and the supporting limbs establish reliable contact with the ground.
Coordination connects the two. Each transition requires the athlete to position the body correctly, transfer weight between support points and generate force in the appropriate direction.
This explains why an athlete with considerable strength may still struggle with the exercise. A strong overhead press does not guarantee the mobility or coordination required for a complete Get-Up.
The solution is to identify the limiting transition and develop the control required to perform it.
🎯 Why Train the Turkish Get-Up?
The Get-Up is particularly valuable because it combines overhead loading and controlled floor-to-standing movement within a single exercise.
It can serve several purposes in a strength and conditioning programme.
As a technical exercise, lighter Get-Ups help develop movement sequencing, overhead awareness and coordinated weight transfer.
As a strength exercise, progressively loaded repetitions challenge the shoulders, trunk and lower body through multiple support positions.
As supplementary training, the Get-Up provides a controlled contrast to ballistic kettlebell exercises, complementing swings, cleans and snatches without attempting to replicate their training effects.
The movement can also reveal transitions where an athlete struggles with balance, mobility or coordination, providing useful direction for targeted practice.
Although the Get-Up involves moving from the floor to standing, performing that task with an overhead kettlebell introduces demands beyond ordinary daily movement.
It should therefore be treated as a specialised strength and movement exercise, not a guaranteed method of preventing injuries, correcting posture or rehabilitating shoulder problems.
🛡️ Prerequisites: Before Attempting a Weighted Get-Up
Beginners do not need exceptional strength or flexibility to begin learning the Turkish Get-Up. However, reliable movement control is essential before attempting the complete exercise under load.
Before progressing to a weighted Get-Up, you should be able to:
- Move comfortably between floor positions: Roll, sit, kneel and stand without significant pain or uncontrolled movement.
- Establish a stable overhead arm: Maintain comfortable shoulder, elbow and wrist positioning without forcing unsuitable joint ranges.
- Control the trunk: Rotate and reposition the torso without losing balance or relying on excessive spinal movement.
- Demonstrate sufficient hip mobility: Perform the seated, leg-sweep and half-kneeling transitions without uncomfortable compensation.
- Maintain reliable support: Support body weight through the elbow, hand, knee and feet as required by each phase.
- Follow the movement sequence: Complete the fundamental transitions without excessive momentum or rushing through unstable positions.
These are practical readiness checks rather than formal strength standards.
Begin with unweighted practice, mastering individual transitions before connecting them into a complete repetition.
The traditional Shoe Get-Up provides additional feedback about overhead-arm positioning, although balancing a shoe does not establish readiness for heavy kettlebell loading.
Once the movement becomes reliable, introduce a suitably light kettlebell and progress according to the technical standards in Section 5.
Master the positions first. Connect the transitions second. Add meaningful load only when the movement is consistent and controlled.
⚡ Quick-Reference: The Hardstyle Turkish Get-Up
Nine essential coaching cues:
| Step | Execution |
|---|---|
| 1. ROLL & PRESS | Secure the kettlebell with both hands, roll onto your back and establish a controlled overhead hold with the working arm extended. |
| 2. PLANT & BRACE | Bend the working-side knee, position the opposite arm and leg diagonally outwards, and engage your trunk before moving. |
| 3. ROLL TO ELBOW | Drive through the planted foot and rotate diagonally onto the opposite elbow, keeping the kettlebell controlled overhead. |
| 4. POST TO HAND | Rotate the supporting forearm, establish palm support and straighten the elbow into a stable tall-sit position. |
| 5. SWEEP | Lift the hips just enough to create clearance, tuck and sweep the free leg underneath, then place the knee securely beneath the body. |
| 6. RECOVER & ALIGN | Recover the torso through the hips, release the supporting hand once balanced and adjust the legs into upright half-kneeling. |
| 7. STAND | Drive through the front foot, rise under control and bring the rear foot forwards to establish a stable standing position. |
| 8. STEP BACK & REOPEN | Lower into a controlled reverse lunge, reopen the kneeling stance, then hinge towards the supporting side and establish hand support. |
| 9. SWEEP BACK & PARK | Return the rear leg forwards beneath the body, lower through the hand and elbow onto your back, then use both hands to park the kettlebell safely. |
⚙️ Biomechanics & Technique
The single-arm Hardstyle Turkish Get-Up is a controlled sequence that takes the athlete from lying on the floor to standing upright while supporting a kettlebell overhead, before reversing the movement and returning safely to the starting position.
Unlike a ballistic lift, the Get-Up does not rely on explosive acceleration or momentum. Each phase requires deliberate positioning, coordinated force production and a stable support base as the body changes orientation beneath the load.
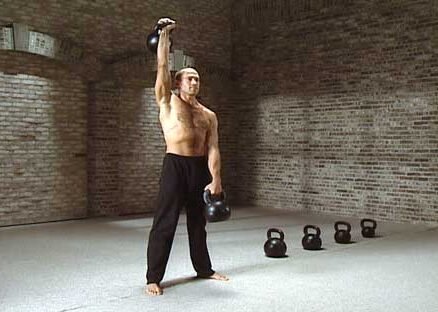
The movement is best understood as a series of connected transitions. Establish control in each position before proceeding to the next, allowing the shoulders, trunk and lower body to work together without unnecessary compensation.
The following breakdown uses the low-sweep Turkish Get-Up, beginning with a safely established overhead position and progressing through the complete ascent and descent.
Phase 1. Safe Kettlebell Setup & Starting Position
The Turkish Get-Up begins with secure kettlebell handling, stable overhead alignment and correctly positioned supporting limbs.
For this walkthrough, the kettlebell is held in the right hand, with the right foot planted and the left arm providing support. Reverse these positions when training the opposite side.
💣 Click on links below for more.
📍 Starting Position
Place the kettlebell on a clear, stable floor with enough room to extend your arms and legs.
Lie on your right side, facing the kettlebell, with your knees comfortably bent and shoulders roughly stacked.
Position the bell close to your chest, gripping the handle with your right hand and reinforcing it with your left. Keep both elbows close to your torso.
🏋️ Execution
- ROLL ONTO YOUR BACK: With both hands securing the kettlebell, roll onto your back while keeping the weight close to your chest. The right elbow remains comfortably bent and supported near the floor.
- ESTABLISH THE OVERHEAD POSITION: Using both hands to assist, press the kettlebell upwards until the right arm is extended, with the load approximately above the shoulder.
- SECURE THE LOAD: Establish a stable wrist, elbow and shoulder position. Once the kettlebell is controlled overhead, carefully release your left hand.
- PLANT THE RIGHT FOOT: Bend the working-side knee and place the foot flat, slightly outside the body’s centreline. Position it to provide effective drive without the heel lifting or knee collapsing inwards.
- POSITION THE LEFT LEG AND ARM: Extend both diagonally outwards at approximately 30–45 degrees, keeping the leg grounded and the supporting palm against the floor. Allow sufficient space for the torso to rotate towards the left elbow.
- BRACE AND PREPARE: Engage the trunk, maintain stable foot pressure and direct your gaze towards the kettlebell without straining the neck.
⚙️ Key Mechanics & Technical Considerations
Overhead Alignment
The working arm provides a stable support beneath the kettlebell as the body changes position.
Maintain:
- Grip: Handle secure across the palm, with the bell resting against the back of the forearm.
- Wrist: Approximately neutral, without excessive backwards bending or sideways collapse.
- Elbow: Extended and controlled without forcing the joint beyond its comfortable range.
- Shoulder: Actively supporting the load without excessive shrugging or forcibly depressing the shoulder blade.
- Trunk: Lightly braced, without unnecessary lumbar extension.
Supporting-Limb Positioning
The planted right foot provides the driving force for the initial roll, while the left arm and leg establish balance and create room for rotation.
The 30–45-degree positions are starting guidelines, not fixed anatomical requirements. Adjust them according to limb proportions and mobility while maintaining reliable support.
Safe Load Management
Never drag a heavy kettlebell towards yourself with an extended arm or allow it to move away from the torso during setup.
The kettlebell should remain controlled approximately above the working shoulder without repeatedly drifting towards the head, abdomen or outside the body.
Being able to press a kettlebell overhead does not establish readiness for a complete Get-Up. The load must remain controllable through every subsequent transition.
✅ Technical Checkpoint
Before progressing to the Roll to Elbow, confirm that you can:
- Establish the overhead position through a controlled, assisted floor press.
- Maintain a secure grip, stable wrist and extended working arm without kettlebell drift.
- Position the planted foot, supporting arm and extended leg to provide reliable support.
- Hold the starting position while breathing and bracing without instability or repeated adjustments.
If these requirements are not met, practise unweighted or reduce the kettlebell load before proceeding.
Coaching cue: Roll together. Press securely. Plant the foot. Own the overhead position.
Phase 2. The Roll to Elbow
The Roll to Elbow moves the athlete from lying on the back into a stable, forearm-supported position while maintaining the kettlebell overhead.
The movement combines planted-foot drive, diagonal trunk rotation and supporting-arm engagement, rather than relying on a conventional sit-up.
💣 Click on links below for more.
📍 Starting Position
Begin lying on your back with the kettlebell in your right hand, the right foot firmly planted and the left arm positioned approximately 30–45 degrees from the torso.
Keep the left leg extended along the floor and the right arm straight, with the kettlebell supported approximately above the working shoulder.
Direct your gaze towards the bell, maintaining comfortable head and neck alignment.
The objective is to roll diagonally towards the left elbow, rather than sitting directly forwards towards the knees.
🏋️ Execution
- DRIVE THROUGH THE FOOT: Press your right foot firmly into the floor, using the hip and leg to initiate movement. Maintain stable foot pressure without allowing the knee to collapse inwards.
- ROTATE DIAGONALLY: Rotate the torso towards the left elbow, allowing the right shoulder and upper back to rise together. Avoid attempting a straight sit-up.
- MAINTAIN OVERHEAD CONTROL: Keep the right arm extended and wrist stable as the torso moves beneath the kettlebell. The left leg remains grounded without kicking upwards for momentum.
- TRANSFER ONTO THE ELBOW: As the torso rises, progressively transfer body weight onto the left forearm and elbow, keeping the supporting shoulder actively engaged.
- ESTABLISH SUPPORT: Position the left elbow approximately beneath the supporting shoulder, with the forearm firmly grounded. Keep the right foot planted, chest comfortably open and kettlebell controlled overhead.
- STABILISE: Pause briefly in the elbow-supported position, confirming that you can maintain balance without repeated adjustments.
The torso should remain naturally inclined and rotated. There is no requirement to sit completely upright at this stage.
⚙️ Key Mechanics & Technical Considerations
Foot Drive and Trunk Rotation
The right leg and hip initiate the movement, while the abdominals and obliques coordinate the diagonal rotation.
The foot drive and trunk movement should occur together, allowing the torso to rise smoothly towards the supporting elbow.
Avoid pulling yourself upwards with the kettlebell arm, kicking the extended leg or relying on excessive abdominal flexion.
Supporting-Arm Stability
As the torso rises, the left forearm and shoulder progressively receive body weight, establishing a new support base.
Position the elbow approximately beneath the shoulder, adjusting slightly for individual proportions and comfort.
Avoid collapsing through the supporting shoulder or placing the elbow so far from the torso that it creates unnecessary strain.
Overhead Control and Body Position
Maintain the working arm extended, with the kettlebell supported overhead as the body changes orientation beneath it.
Keep your gaze towards the bell without forcing the chin towards the chest. Allow the head and neck to move naturally with the torso.
The chest should remain comfortably open without excessive spinal extension.
The essential principle: The planted foot provides the drive, the trunk directs the roll and the opposite arm establishes support.
✅ Technical Checkpoint
Before progressing to the Elbow-to-Hand transition, confirm that you can:
- Perform a controlled diagonal roll using coordinated foot drive and trunk rotation without kicking the extended leg.
- Establish the supporting elbow approximately beneath the shoulder, with the forearm securely grounded.
- Maintain a stable, extended kettlebell arm without excessive wrist movement or overhead drift.
- Pause in the elbow-supported position without collapsing, losing balance or repeatedly adjusting the load.
If the transition remains difficult, revisit the Roll-to-Elbow Drill in Section 4 before increasing the load.
Coaching cue: Drive through the foot. Roll diagonally. Own the elbow.
Phase 3. The Elbow-to-Hand Transition / Tall Sit
The Elbow-to-Hand Transition moves the athlete from forearm support into a stable tall-sit position, preparing the body for the subsequent low sweep.
The movement requires coordinated hand positioning, shoulder engagement and weight transfer, rather than simply straightening the supporting arm.
💣 Click on links below for more.
📍 Starting Position
Begin with the kettlebell in your right hand, right foot planted and left leg extended along the floor.
Position the left elbow approximately beneath the supporting shoulder, with the forearm securely grounded and the trunk naturally inclined towards the supporting side.
Maintain a comfortably open chest and stable overhead arm. Establish balance before moving, rather than relying on momentum from the preceding roll.
🏋️ Execution
- ROTATE THE FOREARM: Gradually rotate your left forearm outwards, turning the palm and fingers towards a suitable supporting position. The fingers may point partially behind you, depending on mobility.
- POSITION THE HAND: Keep the hand in contact with the floor, allowing a small slide or adjustment to position the palm slightly behind and to the side of the torso.
- PRESS THROUGH THE PALM: Apply firm pressure through the supporting hand and begin extending the left elbow, progressively transferring body weight from forearm to palm.
- RISE INTO THE TALL SIT: Straighten the supporting arm while keeping the shoulder actively engaged. Allow the torso to rise naturally, assisted by the planted right foot and trunk musculature.
- MAINTAIN OVERHEAD CONTROL: Keep the right arm extended, wrist stable and kettlebell supported overhead. The left leg remains extended and the hips stay grounded.
- STABILISE: Pause in the tall sit, confirming reliable support through the left hand, shoulder and right foot before attempting the hip lift.
The torso should remain naturally inclined towards the supporting side. There is no requirement to sit completely upright at this stage.
⚙️ Key Mechanics & Technical Considerations
Supporting-Hand Position
The supporting palm should provide a stable base without placing the wrist or shoulder at an awkward angle.
Hand orientation varies according to anatomy and mobility. Small adjustments are acceptable, but avoid lifting the hand unnecessarily and abruptly removing support during the transition.
Shoulder Engagement and Weight Transfer
The supporting triceps extend the elbow, while the shoulder stabilisers control the increasing load transferred through the palm.
The trunk coordinates the rising torso and resists unwanted rotation or collapse.
Unlike the preceding Roll to Elbow, this transition emphasises pressing through the supporting arm rather than generating substantial diagonal rotation.
Avoid collapsing through the supporting shoulder or forcing the torso upright through excessive spinal extension.
Overhead Stability
Maintain the kettlebell approximately above the working shoulder as the body changes position beneath it.
Keep your gaze towards the bell, allowing comfortable head and neck alignment without unnecessarily reaching or shifting the overhead arm to compensate for balance.
The essential principle: Transfer support progressively from elbow to hand while maintaining a stable shoulder, grounded hips and controlled overhead load.
✅ Technical Checkpoint
Before progressing to the Low Sweep, confirm that you can:
- Position the supporting hand securely without unnecessarily removing floor contact.
- Extend the supporting elbow while maintaining active shoulder stability.
- Establish a balanced tall sit with grounded hips, stable planted foot and naturally inclined torso.
- Maintain overhead control without repeated hand adjustments or kettlebell drift.
If the transition remains unstable, revisit the Elbow-to-Hand / Tall-Sit Drill in Section 4 before increasing the load.
Coaching cue: Rotate the hand. Press the floor away. Own the tall sit.
Phase 4. The Hip Lift & Low Sweep
The Low Sweep moves the athlete from the tall sit into the hand-supported kneeling position known as the Kneeling Windmill.
This transition requires controlled hip elevation, precise leg movement and a change in support points while maintaining overhead stability.
Unlike the high-bridge variation, the standard low sweep requires only enough hip elevation to allow the free leg to pass beneath the body.
💣 Click on links below for more.
📍 Starting Position
Begin in the tall sit with the kettlebell supported overhead in your right hand, right foot planted and left leg extended diagonally along the floor.
Position your left palm slightly behind and to the side of the torso, with the supporting elbow extended and shoulder actively engaged.
Keep the hips grounded, trunk controlled and kettlebell stable overhead.
The left hand and right foot will provide the principal support as the hips lift and the free leg begins moving.
🏋️ Execution
- ESTABLISH SUPPORT: Press firmly through the left palm and right foot, maintaining balanced pressure and active shoulder control. Brace the trunk to stabilise the pelvis and overhead load.
- LIFT THE HIPS: Engage the glutes and supporting trunk muscles to raise the pelvis just enough to create clearance for the moving leg. Avoid exaggerated bridging or excessive lumbar extension.
- TUCK THE LEFT LEG: Bend the extended left knee, drawing the leg into a compact position beneath the torso rather than swinging it through a wide arc.
- SWEEP BACKWARDS: Guide the left knee and shin backwards beneath the pelvis, keeping the movement controlled and relatively close to the floor without forcefully dragging the leg.
- PLANT THE KNEE: Lower the left knee gently onto the floor, approximately beneath the left hip. Establish stable support through the left hand, left knee and right foot.
- STABILISE THE KNEELING WINDMILL: Maintain the left supporting arm extended, torso inclined towards the supporting hand and kettlebell controlled overhead. Pause to establish balance before attempting to recover the torso.
The movement should feel like repositioning the leg beneath a stable upper body, rather than throwing the hips or torso into a new position.
⚙️ Key Mechanics & Technical Considerations
Hip Clearance and Leg Movement
The glutes and supporting trunk muscles help unload the pelvis, creating sufficient space for the free leg to move underneath.
The required hip elevation depends on limb proportions, mobility and supporting-limb positioning.
Lift only as high as necessary. Excessive bridging increases balance demands without improving the efficiency of the low sweep.
Keep the moving leg compact, allowing the knee and shin to travel beneath the body without an exaggerated arc.
If the leg cannot pass comfortably, reassess hip clearance and supporting-limb placement rather than forcing the movement.
Changing the Support Base
Initially, the left hand and right foot provide the principal support while the hips lift and the free leg moves.
Once the left knee contacts the floor, body weight is redistributed across three points:
Left hand: Securely planted, with the supporting arm extended and shoulder engaged.
Left knee: Grounded approximately beneath the hip, providing stable lower-body support.
Right foot: Firmly planted forwards, maintaining reliable pressure through the floor.
Knee placement should accommodate individual proportions without positioning it excessively close to the front foot or so far backwards that torso recovery becomes difficult.
Avoid unnecessary shifting of the supporting hand or foot during the sweep.
Trunk and Overhead Stability
Maintain sufficient trunk tension to control pelvic movement without excessive spinal arching or rotation.
The torso remains inclined towards the supporting hand, with the kettlebell controlled overhead and the working shoulder actively engaged.
Keep your gaze towards the kettlebell where comfortable, without forcing excessive neck rotation.
Do not rush to raise the torso once the knee is grounded. Establish reliable support through the hand, knee and foot before progressing to the half-kneeling recovery in Phase 5.
The essential principle: Create sufficient hip clearance, move the free leg beneath the body and establish a stable three-point support base without disturbing the overhead load.
✅ Technical Checkpoint
Before progressing to the Half-Kneeling Transition, confirm that you can:
- Maintain secure support through the planted foot and opposite hand.
- Create sufficient hip clearance without excessive bridging or trunk compensation.
- Tuck and sweep the free leg backwards along a compact, controlled path.
- Place the knee securely beneath the body and establish a balanced three-point Kneeling Windmill.
- Pause in the new position without losing trunk stability or overhead control.
If the transition remains difficult, revisit the Low-Sweep Preparation Drill in Section 4 before increasing the load.
Coaching cue: Press through the supports. Lift just enough. Sweep low. Plant the knee.
Phase 5. Recovery to Upright Half-Kneeling
This transition moves the athlete from the hand-supported Kneeling Windmill into a balanced, upright half-kneeling position.
The movement requires hip-driven torso recovery, progressive weight transfer and lower-body realignment, while maintaining control of the kettlebell overhead.
💣 Click on links below for more.
📍 Starting Position
Begin in the Kneeling Windmill with the kettlebell supported overhead in your right hand, left palm planted beneath the supporting shoulder, left knee grounded and right foot firmly planted forwards.
The torso remains inclined towards the left hand, with the supporting elbow extended and shoulder actively engaged.
Establish stable support through the left hand, left knee and right foot before attempting to rise.
🏋️ Execution
- DRIVE THROUGH THE HIPS: Press through the right foot and left knee, engaging the glutes and trunk muscles to bring the pelvis beneath the torso.
- RECOVER THE TORSO: Allow the body to rise progressively from its sideways inclination, maintaining abdominal control without excessive lumbar extension or rotation.
- RELEASE THE SUPPORTING HAND: Gradually reduce pressure through the left palm as the lower body assumes more weight. Once balanced, lift the hand away and allow the arm to settle beside the body.
- ESTABLISH UPRIGHT KNEELING: Pause briefly with the right foot planted, left knee grounded and kettlebell controlled overhead before adjusting the legs.
Aligning the Lower Body
The rear lower leg may remain angled outwards following the low sweep. Before standing, reposition the legs into a stable half-kneeling lunge using one of two methods.
Method A: The Windshield-Wiper Adjustment
Our primary Hardstyle approach repositions the rear lower leg while the knee remains grounded.
- Maintain balance through the right foot and left knee.
- Reduce pressure through the left knee sufficiently to permit comfortable movement.
- Rotate the left foot and shin from the hip, bringing the lower leg towards a conventional rearward lunge position.
- Position the rear foot comfortably behind the body, with the toes tucked under if appropriate.
- Re-establish stable support before proceeding.
Avoid twisting the grounded knee against the floor. Unload it as necessary and allow the adjustment to occur through the hip.
Method B: The Front-Foot Step-Across
Alternatively, leave the grounded knee relatively stationary and reposition the front foot.
- Establish a balanced upright kneeling position with the kettlebell controlled overhead.
- Shift sufficient weight towards the left knee to unload the right foot.
- Carefully lift or slide the right foot into a conventional half-kneeling stance.
- Replant the foot securely, with the right knee tracking comfortably towards the toes.
- Re-establish balance before continuing.
This method avoids rotating the rear lower leg around the grounded knee, but temporarily reduces lower-body support.
Practise the front-foot step-across without external loading before attempting it with a kettlebell overhead.
Both methods are valid. Choose whichever provides comfortable joint positioning, reliable balance and consistent overhead control.
Establishing the Final Position
Once aligned, pause in a stable half-kneeling lunge with the right foot planted forwards and left knee beneath or slightly behind the hip.
Maintain sufficient lateral separation between the legs for balance, with the torso upright and ribs controlled above the pelvis.
Shift your gaze forwards, keeping the head and neck comfortably aligned. Breathe steadily and confirm overhead stability before beginning the final ascent.
⚙️ Key Mechanics & Technical Considerations
Hip-Driven Recovery
The glutes and supporting hip muscles bring the pelvis beneath the torso, while the trunk controls unwanted lateral bending and rotation.
The movement resembles recovery from a half-kneeling hip hinge, rather than pulling the torso upright through lower-back extension.
Progressive Weight Transfer
As the torso rises, body weight transfers from the supporting hand onto the planted foot and grounded knee.
Maintain hand contact until the lower body provides reliable support. Avoid abruptly releasing the hand or using excessive spinal extension to complete the recovery.
Lower-Body Alignment and Overhead Control
The leg adjustment establishes a stable lunge from which the lower body can generate force for standing.
The windshield-wiper method remains our primary approach, with the front-foot step-across available when more comfortable.
Avoid forcing the legs into a narrow stance, twisting the grounded knee or sacrificing overhead control to achieve a particular position.
The essential principle: Recover through the hips, transfer support progressively and align the lower body before standing.
✅ Technical Checkpoint
Before progressing to the Rise to Standing, confirm that you can:
- Recover the torso through controlled hip movement without excessive spinal extension.
- Progressively release the supporting hand without losing balance.
- Reposition the legs using a comfortable windshield-wiper adjustment or front-foot step-across.
- Establish a stable half-kneeling position with the front foot firmly planted and adequate lateral support.
- Maintain overhead control while looking forwards and breathing comfortably.
If either transition remains difficult, revisit the Kneeling Windmill Recovery Drill or Half-Kneeling Alignment Drill in Section 4.
Coaching cue: Drive through the hips. Rise under control. Align the legs. Own the lunge.

Phase 6. The Rise to Standing
Begin in a balanced half-kneeling position with the kettlebell in your right hand, right foot planted forwards and left knee grounded beneath or slightly behind the hip.
Position the rear foot comfortably behind you, with the toes tucked under if appropriate. Maintain sufficient lateral separation between the legs for balance.
Keep the front knee broadly aligned with the toes, trunk upright and ribs controlled above the pelvis.
The right arm remains extended overhead, with the wrist aligned and shoulder actively supporting the load.
Direct your gaze forwards and establish stable foot pressure before moving.
💣 Click on links below for more.
📍 Starting Position
Begin in the Kneeling Windmill with the kettlebell supported overhead in your right hand, left palm planted beneath the supporting shoulder, left knee grounded and right foot firmly planted forwards.
The torso remains inclined towards the left hand, with the supporting elbow extended and shoulder actively engaged.
Establish stable support through the left hand, left knee and right foot before attempting to rise.
🏋️ Execution
- DRIVE THROUGH THE FRONT FOOT: Press firmly through the right foot, maintaining pressure through the heel and midfoot as the quadriceps and glutes initiate the ascent.
- RISE THROUGH THE LUNGE: Extend the right knee and hip, allowing the left knee to lift smoothly from the floor. The rear leg assists with balance and contributes force through the toes where appropriate.
- MAINTAIN TRUNK CONTROL: Continue rising without pitching excessively forwards, leaning backwards or exaggerating lumbar extension. Keep the kettlebell stable overhead.
- ESTABLISH BALANCE: Transfer sufficient weight onto the right leg before moving the rear foot forwards.
- COMPLETE THE STAND: Step the left foot forwards into a comfortable, approximately hip-width stance. Extend the hips and knees naturally, maintaining balanced foot pressure and a stable overhead arm.
- STABILISE: Pause briefly, confirming that you can stand without repeated foot adjustments, excessive trunk movement or kettlebell drift.
Maintain appropriate abdominal tension and exhale naturally through the effort, avoiding unnecessary prolonged breath-holding.
Standing marks the midpoint of the Turkish Get-Up. The repetition is complete only after the controlled descent and return to the floor.
⚙️ Key Mechanics & Technical Considerations
Lower-Body Force Production
The quadriceps and glutes of the leading leg generate much of the force required to stand, while the rear leg assists with balance and contributes to the ascent where appropriate.
Maintain pressure through the planted front foot without allowing the heel to lift prematurely or the knee to collapse inwards.
The movement should be driven through the legs rather than by throwing the torso forwards or thrusting the kettlebell upwards.
Balance and Weight Transfer
As the body rises, weight transfers from the staggered half-kneeling position towards the leading leg before returning to a balanced two-foot stance.
Avoid bringing the rear foot forwards before sufficient stability has been established.
The final stance should provide comfortable balance without forcing the feet into an unnecessarily narrow position.
Trunk and Overhead Stability
Maintain sufficient trunk tension to control the asymmetrical load without excessive lumbar extension, lateral leaning or unnecessary rigidity.
Keep the working arm extended, wrist aligned and shoulder actively supporting the kettlebell as the body rises beneath it.
The essential principle: Generate upward force through the legs while maintaining trunk control and stable overhead positioning.
✅ Technical Checkpoint
Before progressing to the Reverse Turkish Get-Up, confirm that you can:
Rise from half-kneeling through controlled front-leg drive, with appropriate rear-leg assistance.
Maintain reliable foot pressure, knee alignment and trunk stability.
Bring the rear foot forwards without losing balance or disturbing the overhead load.
Finish standing comfortably with the kettlebell controlled overhead and gaze directed forwards.
If the ascent remains unstable, revisit the Half-Kneeling-to-Standing Drill in Section 4 before increasing the load.
Coaching cue: Drive through the front foot. Rise tall. Bring the feet level. Own the finish.
Phase 7. The Reverse Turkish Get-Up: Controlled Descent
The Reverse Turkish Get-Up returns the athlete from standing to the floor through the support positions established during the ascent.
Although gravity assists the descent, the movement requires controlled weight transfer, precise limb positioning and sustained overhead stability.
The objective is to reverse each transition deliberately, establishing balance before changing support points.
💣 Click on links below for more.
📍 Starting Position
Begin standing upright with the kettlebell supported overhead in your right hand, both feet firmly planted and the trunk controlled.
Maintain an extended working arm, stable wrist and comfortable forward gaze.
The kettlebell remains controlled overhead throughout the descent until your back is securely supported on the floor.
🏋️ Execution
Step 1. Return to Half-Kneeling
- STEP BACK: Transfer sufficient weight onto the right foot and step the left leg backwards into a balanced reverse lunge, maintaining lateral separation between the feet.
- LOWER UNDER CONTROL: Bend both knees progressively, using the hips and legs to control the descent while maintaining trunk and overhead stability.
- PLANT THE KNEE: Lower the left knee gently onto the floor without dropping your body weight onto it.
- STABILISE: Pause in a balanced half-kneeling position with the right foot firmly planted and gaze directed forwards.
Step 2. Reopen the Kneeling Position
Reverse the leg adjustment performed during Phase 5, creating sufficient space to return towards the Kneeling Windmill.
Method A: Reverse Windshield Wiper
- Maintain stable support through the right foot and left knee.
- Reduce pressure through the grounded knee to permit comfortable movement.
- Rotate the left foot and shin outwards from the hip, returning the lower leg towards its open kneeling position.
- Re-establish balance before continuing.
Avoid twisting the knee against the floor. Unload it as necessary and allow the adjustment to occur primarily through the hip.
Method B: Reverse Front-Foot Step-Across
If you used the front-foot step-across during the ascent, reverse that adjustment instead.
- Maintain balance through the left knee and right foot.
- Shift sufficient weight towards the grounded knee to unload the right foot.
- Carefully reposition the right foot into the wider, open kneeling stance.
- Replant it securely and establish balance before continuing.
Use the method established during your ascent, prioritising comfortable joint positioning and overhead control.
Step 3. Hinge and Establish Hand Support
- HINGE TOWARDS THE SUPPORTING SIDE: Shift the hips towards the right as the torso inclines left, using a controlled hip hinge rather than excessive sideways spinal bending.
- FIND THE FLOOR: Direct your gaze towards the kettlebell and lower the left hand towards the floor near the left knee, approximately beneath the supporting shoulder.
- ESTABLISH PALM SUPPORT: Place the hand securely, with the fingers directed at a comfortable angle.
- TRANSFER WEIGHT: Progressively load the left palm, keeping the elbow extended and supporting shoulder actively engaged.
- STABILISE: Pause in the three-point Kneeling Windmill, supported by the left hand, left knee and right foot.
Hand placement may vary with individual proportions. Establish secure support before attempting the reverse sweep.
Step 4. Reverse the Low Sweep
- CREATE CLEARANCE: Press through the left hand and right foot, raising the hips only enough for the moving leg to pass underneath.
- UNLOAD THE KNEE: Gently lift the left knee from the floor while maintaining stable shoulder and trunk support.
- SWEEP FORWARDS: Guide the bent left leg beneath the pelvis, keeping the movement compact and the shin relatively close to the floor.
- EXTEND THE LEG: Once clear of the pelvis, guide the left leg diagonally forwards, progressively extending the knee as the hips lower.
- RETURN TO THE TALL SIT: Ground the hips with the left leg extended, right foot planted and left hand securely supporting the torso.
Avoid swinging the leg widely, forcefully dragging the knee or maintaining an unnecessarily high bridge.
Step 5. Lower from Hand to Elbow
- BEGIN THE DESCENT: From the tall sit, bend the left elbow and allow the torso to lower diagonally towards the supporting side.
- TRANSFER SUPPORT: Progressively shift body weight from the palm onto the forearm, adjusting its position naturally as the torso descends.
- ESTABLISH ELBOW SUPPORT: Position the left elbow approximately beneath the supporting shoulder, maintaining active shoulder and trunk control.
- STABILISE: Pause with the left forearm grounded, right foot planted, left leg extended and kettlebell controlled overhead.
Lower onto the elbow deliberately rather than collapsing towards it.
Step 6. Roll from Elbow to Back
- CONTROL THE ROTATION: Maintain right-foot pressure as you gradually lower the torso away from the supporting left elbow.
- ROLL DIAGONALLY: Use the abdominal and oblique muscles to control the movement, allowing the upper back and shoulders to return progressively towards the floor.
- MAINTAIN SUPPORT: Keep the left forearm engaged until the torso can lower safely, with the kettlebell arm remaining extended overhead.
- COMPLETE THE DESCENT: Lower the head gently, avoiding abrupt movement or prematurely releasing the supporting arm.
- STABILISE: Once the back and head are fully supported, establish control of the kettlebell above the right shoulder.
Do not release the supporting elbow and allow gravity to complete the movement.
You have now completed one full Turkish Get-Up repetition: floor to standing and back to the floor.
Step 7. Lower and Park the Kettlebell
When finishing the set, reverse the assisted handling procedure established during Phase 1.
- SECURE THE LOAD: From the supine position, bring the left hand to the kettlebell handle while maintaining right-arm control.
- LOWER TO THE CHEST: Establish a secure two-handed grip before bending the working elbow and lowering the kettlebell towards the right side of the chest.
- ROLL ONTO THE SIDE: Bend the knees as necessary and roll carefully onto your right side, keeping the weight close to the torso and controlled with both hands.
- PARK THE KETTLEBELL: Guide the bell onto the floor beside your upper body, releasing the handle only when the weight is fully supported and stable.
Never allow the kettlebell to drop towards the shoulder or attempt to catch an uncontrolled falling weight. Further emergency considerations are covered in Section 8.
The repetition finishes on the floor. The set finishes when the kettlebell is safely parked.
⚙️ Key Mechanics & Technical Considerations
Controlled Lower-Body Descent
The quadriceps and glutes control the reverse lunge, with the leading leg managing much of the lowering effort while the rear leg assists with balance.
Maintain appropriate knee alignment and trunk stability, avoiding abrupt lowering or excessive forward and sideways leaning.
Progressive Weight Transfer
The descent involves successive changes in the body’s support base:
- Standing to half-kneeling: Transfer weight onto the planted front foot and grounded rear knee.
- Half-kneeling to Kneeling Windmill: Hinge through the hips and progressively establish supporting-hand contact.
- Reverse low sweep: Maintain reliable hand and foot support while repositioning the free leg.
- Hand to elbow: Transfer body weight progressively onto the forearm.
- Elbow to back: Control the diagonal rotation until the torso and head are securely grounded.
- Establish each new support position before removing or reducing the previous support.
Hip Clearance and Lower-Body Alignment
The reverse low sweep requires only enough hip elevation to move the leg beneath the pelvis.
Keep the leg compact and the supporting limbs stable, avoiding excessive bridging or uncontrolled pelvic movement.
During the kneeling realignment, prioritise comfortable hip movement without forcing rotation through the grounded knee.
Trunk and Overhead Stability
Maintain the working arm extended and the kettlebell controlled as the body changes orientation beneath it.
The trunk manages rotation, lateral movement and lowering without excessive spinal extension or sudden changes in momentum.
Use comfortable gaze direction, looking forwards during upright transitions and towards the kettlebell where appropriate during floor movements.
Safe Kettlebell Return
Maintain overhead control until the body is securely supported in the supine position.
Use both hands for the final lowering and parking procedure, keeping the kettlebell close to the torso.
The essential principle: Reverse each transition under control, establish reliable support before transferring weight and maintain overhead stability until the kettlebell can be safely returned to the floor.
✅ Technical Checkpoint
A successful Reverse Turkish Get-Up should demonstrate:
- A controlled reverse lunge with gentle rear-knee placement and appropriate lower-body alignment.
- A stable return to the Kneeling Windmill, with secure hand, knee and foot support.
- A compact reverse low sweep with sufficient hip clearance and controlled leg movement.
- Progressive weight transfer from hand to elbow and onto the back without collapsing.
- Consistent overhead stability and a secure two-handed kettlebell return when finishing the set.
You should be able to pause at each major support position without losing balance or repeatedly correcting the kettlebell.
If the descent becomes unreliable, reduce the load and revisit the Controlled Reverse-Transition Drill in Section 4.
Coaching cue: Step back. Open the hips. Find the floor. Sweep low. Roll down. Park safely.
🫁 Breathing and Bracing
In Hardstyle kettlebell training, breathing is coordinated with explosive movement to reinforce trunk stability, tension and force production.
Establish abdominal tension before the drive, then coordinate a short, forceful exhalation with explosive hip extension, completing it at or near lockout.
Inhale during the returning backswing, maintaining sufficient trunk control to prepare for the next repetition.
Avoid prolonged breath-holding during continuous swings. Brief changes in abdominal pressure are a normal part of Hardstyle bracing, but breathing should remain controlled and coordinated with the movement.
Other kettlebell training systems may use different breathing strategies.
Coaching cue: Brace before the drive. Exhale through lockout. Inhale on the reload.
⚠️ Common Faults & Rapid Corrections
The Turkish Get-Up requires coordinated movement through several changing support positions. A technical fault in one transition can disrupt the next, producing poor balance, unstable overhead positioning or unnecessary muscular effort.
Most problems arise from incorrect setup, ineffective weight transfer, unstable support, insufficient movement control or excessive loading.
Use the following guide to identify the problem, apply a targeted correction and select the appropriate practice drill from Section 4.
💣 Click on links below for more.
❌ Unsafe Kettlebell Setup or Return
The problem: Pulling the kettlebell into position with an extended arm, pressing from an awkward angle or lowering the weight without assistance creates unnecessary shoulder-loading demands.
The correction: Begin side-lying with the kettlebell close to your chest. Secure it with both hands, roll onto your back and establish the overhead position through a controlled, assisted floor press. Reverse the sequence when parking the weight.
Coaching cue: Keep it close. Use both hands. Control the park.
Corrective drill: Safe Setup & Park Drill.
❌ Unstable Wrist or Overhead Alignment
The problem: The wrist bends excessively backwards, the working elbow loses extension or the kettlebell repeatedly drifts from its supporting position. Poor grip placement, inadequate overhead control or excessive load may contribute.
The correction: Establish a secure grip with the handle supported across the palm. Maintain a controlled wrist and extended working arm, allowing natural shoulder movement as the torso changes orientation. Reduce the load if overhead stability remains unreliable.
Coaching cue: Strong wrist. Stable shoulder. Control the bell.
Corrective drill: Overhead Hold & Alignment Drill.
❌ Poor Planted-Foot Positioning
The problem: A foot positioned too far from the hips, excessively close to the body or too narrow to provide effective support makes the initial roll difficult. The heel may lift, the foot may shift or the knee may collapse inwards.
The correction: Adjust the working-side foot until you can press firmly through the floor with the heel grounded and knee controlled. Use a comfortable position that accommodates your proportions rather than forcing an exact distance.
Coaching cue: Plant firmly. Drive through the floor.
Corrective drill: Roll-to-Elbow Drill.
❌ Attempting a Straight Sit-Up Instead of a Diagonal Roll
The problem: Raising the torso directly towards the knees relies excessively on abdominal flexion and fails to use the planted foot and supporting elbow effectively.
The correction: Drive through the planted foot while rotating diagonally towards the opposite elbow. Allow the trunk and supporting forearm to work together rather than attempting to sit directly forwards.
Coaching cue: Drive and roll. Don’t sit straight up.
Corrective drill: Roll-to-Elbow Drill.
❌ Kicking the Extended Leg During the Roll
The problem: The free leg swings or kicks upwards to help raise the torso, often compensating for ineffective foot drive or poorly coordinated trunk rotation.
The correction: Keep the extended leg controlled against the floor and initiate the movement through the planted foot. Practise a shorter, unweighted diagonal roll until the torso can rise without assistance from leg momentum.
Coaching cue: Drive with the planted foot. Keep the free leg quiet.
Corrective drill: Roll-to-Elbow Drill.
❌ Unstable Elbow-to-Hand Transition
The problem: The supporting arm struggles to straighten, the hand repeatedly lifts and relocates, or the supporting shoulder collapses under body weight.
The correction: Begin with the elbow approximately beneath the shoulder. Rotate the forearm to establish a comfortable palm position, then press through the hand to extend the supporting arm. Make small adjustments where necessary without abruptly removing support.
Coaching cue: Rotate the hand. Press the floor away.
Corrective drill: Elbow-to-Hand / Tall-Sit Drill.
❌ Excessive Hip Bridge or Insufficient Sweep Clearance
The problem: Raising the hips unnecessarily high introduces additional balance demands, while insufficient elevation prevents the moving leg from passing comfortably beneath the pelvis.
The correction: Press through the supporting hand and planted foot to lift the hips only enough to clear the leg. Maintain trunk control without forcing excessive lower-back extension.
Coaching cue: Lift just enough. Create the space.
Corrective drill: Low-Sweep Preparation Drill.
❌ Swinging the Leg Too Widely During the Sweep
The problem: Moving the extended leg through a large arc disturbs balance and may cause unnecessary torso rotation or kettlebell movement.
The correction: Bend the free knee, tuck the leg beneath the body and guide the shin backwards along a compact path close to the floor. Maintain firm support through the planted foot and opposite hand.
Coaching cue: Tuck the knee. Sweep low. Stay controlled.
Corrective drill: Low-Sweep Preparation Drill.
❌ Incorrect Knee Placement After the Sweep
The problem: The swept knee lands too close to the front foot or excessively far from the intended support position, making the Kneeling Windmill unstable and torso recovery awkward.
The correction: Place the knee approximately beneath the hip, establishing a balanced relationship between the grounded knee, supporting hand and planted foot. Adjust for individual proportions rather than forcing an exact geometric position.
Coaching cue: Place the knee. Build the base.
Corrective drill: Low-Sweep Preparation Drill.
❌ Pulling Upright Through the Lower Back
The problem: Attempting to recover from the Kneeling Windmill primarily through lumbar extension or forceful sideways movement produces excessive arching and may disturb the overhead load.
The correction: Press through the planted foot and grounded knee, bringing the hips beneath the torso while maintaining trunk control. Gradually unload the supporting hand as balance transfers onto the lower body.
Coaching cue: Move through the hips. Bring the torso upright.
Corrective drill: Kneeling Windmill Recovery Drill.
❌ Forcing the Rear-Knee Windshield Wiper
The problem: Rotating the rear foot and shin while the grounded knee remains heavily loaded can create uncomfortable twisting forces and disrupt balance.
The correction: Reduce pressure through the knee and rotate the lower leg primarily from the hip. If the movement remains uncomfortable, practise the alternative front-foot step-across without external loading.
Coaching cue: Unload the knee. Rotate through the hip.
Corrective drill: Half-Kneeling Alignment Drill.
❌ Losing Balance During the Rise to Standing
The problem: Excessive torso leaning, lifting the front heel, poor knee alignment or stepping the rear foot forwards prematurely makes the ascent unstable.
The correction: Begin from a balanced half-kneeling stance. Drive through the whole front foot, extend the leading hip and knee, and bring the rear foot forwards only after establishing sufficient support.
Coaching cue: Drive through the foot. Rise tall. Find your balance.
Corrective drill: Half-Kneeling-to-Standing Drill.
❌ Rushing or Collapsing During the Reverse Get-Up
The problem: The athlete descends too quickly, drops onto the rear knee, reaches abruptly for the floor or collapses from hand to elbow. Fatigue or inadequate control of the reverse sequence may contribute.
The correction: Treat each descending transition as a controlled movement. Lower gently into the lunge, establish secure hand support before sweeping and transfer weight progressively through the forearm before returning to the floor.
Coaching cue: Lower deliberately. Find each support.
Corrective drill: Controlled Reverse-Transition Drill.
❌ Allowing Fatigue or Excessive Load to Dictate Technique
The problem: The kettlebell becomes increasingly difficult to stabilise, transitions become rushed or movement quality deteriorates between repetitions or sides.
The correction: Reduce the load, increase recovery or end the set when control becomes unreliable. Address weaker transitions with targeted drills rather than forcing additional loaded repetitions. Do not continue when you cannot maintain overhead stability or complete a controlled descent.
Coaching cue: Control every transition. Stop before technique fails.
Corrective drill: Unweighted Turkish Get-Up Patterning (Drill 1), once adequately recovered. Resume Complete Turkish Get-Up Practice (Drill 11) only when movement quality is restored, using an appropriate load.
🎯 When to Return to a Skill Drill
When a particular transition becomes unreliable, isolate the problem rather than repeatedly attempting the complete Get-Up.
Use the corresponding Section 4 drill to practise the movement at a manageable difficulty. Once the position and weight transfer are controlled, reconnect the transition to the full sequence.
If several phases remain unstable, return to unweighted patterning before introducing further resistance.
Identify the fault. Correct the movement. Rebuild consistency before increasing the load.
🚀 TGU Variations & Progressions
The Turkish Get-Up can be adapted to emphasise different aspects of strength, stability, coordination and movement control.
Some variations isolate particular transitions, while others change the support positions, introduce additional exercises or alter how the load is balanced.
Not every modification represents a new technique. Unweighted practice, shoe balancing and heavier kettlebells are primarily learning or loading progressions, whereas the high bridge and bottoms-up Get-Up introduce distinct mechanical challenges.
The standard low-sweep Get-Up remains our foundation. Explore variations when they serve a specific training objective, not simply to make the movement more complicated.
🧩 Partial Turkish Get-Ups
Primary focus: Strength and control through selected movement phases.
A Partial Turkish Get-Up involves completing a defined portion of the movement before reversing back to the floor.

Common variations include:
- Get-Up to Elbow: Roll onto the supporting elbow, establish control and return to the floor.
- Get-Up to Hand: Continue into the tall sit, then reverse the transition.
- Get-Up to Kneeling: Progress through the low sweep and Kneeling Windmill into upright half-kneeling before descending.
Partial Get-Ups allow athletes to concentrate on difficult transitions without completing the entire exercise. They can also provide targeted strength work when performed with appropriately controlled resistance.
For example, a Get-Up to Hand emphasises the diagonal roll and supporting-arm strength, while a Get-Up to Kneeling introduces greater demands on hip movement and lower-body positioning.
The term half Get-Up can refer to different stopping points across coaching systems. This workshop identifies partial variations by their finishing position to avoid confusion.
Progression: Begin with the portion you can control reliably, then extend the movement to the next support position. Introduce resistance only when both the ascent and return are secure.
Key principle: Develop the weakest transition before progressing to a more demanding movement.
⏸️ Paused Turkish Get-Up
Primary focus: Positional stability, movement awareness and sustained muscular control.
The Paused Turkish Get-Up follows the standard sequence but introduces deliberate holds at selected positions.

Useful pause points include:
- The supporting elbow.
- The tall sit.
- The Kneeling Windmill.
- Upright half-kneeling.
- The standing finish.
Perform a normal Get-Up using a manageable load, pausing briefly at one or more positions while maintaining overhead stability, balance and comfortable breathing.
Pauses can also be incorporated during the descent, particularly when returning to the Kneeling Windmill or transferring from hand to elbow support.
This variation increases time under tension and helps identify positions that require repeated adjustments.
Progression: Introduce pauses at more demanding transitions or extend selected holds modestly. Avoid increasing the load and pause duration simultaneously.
Key principle: Own each position before continuing. Longer holds are useful only while stability remains reliable.
🙃 Bottoms-Up Turkish Get-Up
Primary focus: Grip strength, wrist stability and precise overhead control.
The Bottoms-Up Turkish Get-Up involves holding the kettlebell inverted, with the handle below the body of the bell and its rounded base pointing upwards.
Unlike a conventional kettlebell hold, the bell does not rest against the forearm. The athlete must maintain sufficient grip tension and wrist control to prevent the inverted weight from tipping.
This substantially increases the balance demands placed on the hand, forearm and working shoulder.
Practical Application
Begin by establishing reliable bottoms-up control in simpler positions, using a kettlebell considerably lighter than your conventional Get-Up load.
Progress towards controlled partial Get-Ups before attempting the complete movement.
Throughout the exercise, maintain a secure grip and avoid sudden accelerations or aggressive wrist corrections.
Particular care is required when establishing and returning the inverted kettlebell. The conventional two-handed setup described in Section 2 should not automatically be applied to bottoms-up loading. Practise establishing and lowering the inverted kettlebell safely before attempting a complete Get-Up, preferably with guidance from an experienced instructor. If you cannot control the setup or return reliably, do not attempt the loaded variation.
Never attempt to catch or rescue an inverted kettlebell once control has been lost.
Progression: Stable bottoms-up holds, followed by partial Get-Ups and eventually complete repetitions when the load can be controlled reliably.
Key principle: The challenge is precise load control, not lifting the heaviest possible inverted kettlebell.
⚡ Heavy Hardstyle Swing
Difficulty: Advanced
Primary focus: High-force hip extension and posterior-chain loading.
The heavy Hardstyle swing is a loading progression rather than an entirely new movement. The same fundamental mechanics apply, but the increased resistance demands greater force production and control.
Prioritise short, explosive sets with generous recovery. The kettlebell may rise below chest height as loading increases, which is acceptable provided the movement remains technically sound.
Suggested practice: 4–6 sets of 5 repetitions, with adequate recovery between sets.
Remember: A heavier kettlebell should challenge your strength without compromising acceleration, balance or positioning.
🎯 Which Variation Should You Choose?
| Training Objective | Suitable Variation |
|---|---|
| Improve specific transitions | Partial Turkish Get-Ups |
| Develop positional stability | Paused Turkish Get-Up |
| Challenge hip extension and support | High-Bridge Turkish Get-Up |
| Increase grip and overhead-control demands | Bottoms-Up Turkish Get-Up |
| Combine pressing and Get-Up strength | Turkish Get-Up with Presses |
| Explore alternative resistance | Dumbbell or Sandbag Get-Up |
| Develop greater maximal strength | Progressively heavier conventional Get-Ups |
Not every athlete needs to explore every variation.
A well-executed standard Turkish Get-Up remains a demanding exercise capable of developing considerable strength, coordination and movement control.
Master the fundamental sequence first. Choose variations that serve a purpose, and increase difficulty only when the additional demands can be controlled.
🏁 Final Takeaway
Strength Through Control
The Turkish Get-Up brings together strength, mobility, balance and overhead stability through a demanding sequence of coordinated movements.
Its value lies not simply in rising from the floor with a kettlebell overhead, but in developing the ability to control every transition as the body’s position and support points change.
From the Roll to Elbow and Low Sweep to the Kneeling Windmill and Rise to Standing, each phase demands deliberate positioning and reliable movement. Master these individual transitions, connect them smoothly and progress the load only when the entire sequence remains controlled.
Reaching standing is only half the movement. The real standard is returning to the floor with the same precision, strength and control demonstrated on the way up.
If you have enjoyed this post please share or feel free to comment below 🙂
🔗 Our Other Posts

Baba Yaga – The John Wick Workout
Inspired by the world’s deadliest assassin, the John Wick Workout combines combat conditioning, kettlebell training,
The Functional Training Toolbox
Barbells, kettlebells, sandbags, sleds, ropes, bands and more. The functional training toolbox is huge, but

Krav Maga – Characteristics and Principles
Krav Maga isn’t built around perfect technique. It’s built around making simple, workable decisions under
🇷🇺 Eastern Europe — Sambo, Wrestling & Combat Systems
From folk wrestling traditions and Sambo to military combatives and modern MMA, Eastern Europe’s martial