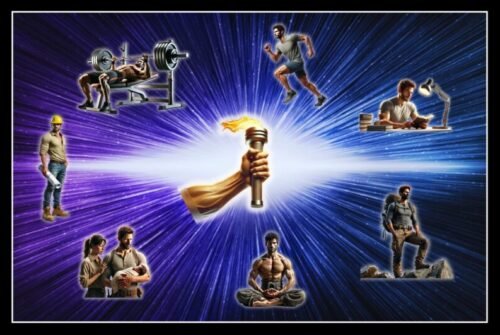
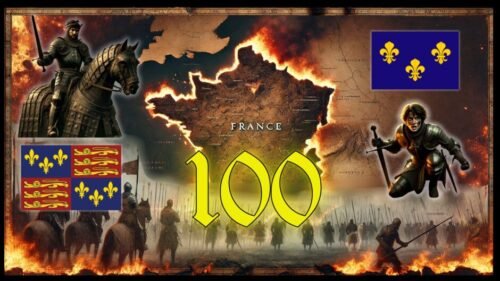
Pull ups. Pull Up progression. Upper body exercises. Back exercises. Lat workouts. Shoulder exercises. Arm exercises.

Pull Up Progression

Welcome to our Pull Up Progression post! This post is for people wishing to include pull ups in their workouts but lacking the required upper body strength. Start from the ground upwards.

Introduction

Pull-ups are undoubtedly one of the most effective upper body exercises for developing pulling strength and muscle mass in the upper body.  If you aren’t doing them then you are missing out. If you aren’t doing them because you can’t… Fear not, for that is something that can be overcome with a bit of work and perseverance.

Pull-up Progression Exercises

Assisted pull-ups are a progressive way to building the required strength to undertake a regular pull-up.  Assisted pull ups use methods that reduce the resistance of your full bodyweight. For example, the use of resistance bands or an assisted pull-up machine to make the exercise easier. 

These methods can make undertaking the pull-up much easier (and more achievable) but still challenging nonetheless.

As you progress you can gradually lessen the amount of assistance until you have built up the required upperbody strength to perform the exercise unassisted. 

Pull Up progression. Upper body exercises. Back exercises. Lat workouts. Shoulder exercises. Arm exercises.
A great philosopher once said "a workout of a thousand pull ups begins with a single pull up"...or something like that 😀

Do not think for a second however, that you will not have your work cut out for you however! Performing assisted pull-ups, still requires a great deal of concentration, effort and willpower.  It is important that you maintain your form throughout and focus on using the correct muscle groups rather than relying too much on the assistance.

The following are 11 progression exercises (leading up to a full unassisted pull-up) that will help you build up the required strength with practice: 

  1. Resistance Back rows.
  2. Inverted Body Rows.
  3. Dead hangs.
  4. Negative Pull-ups
  5. Flexed Arm hangs.
  6. Body rows.
  7. Leg assisted Pull-ups.
  8. Band assisted Pull-ups.
  9. ‘Kipping’ Pull-ups.
  10. Chin-ups.
  11. The Main Event: The Pull-up

1. Resistance Back Rows

If you’re starting from the very beginning, this is where you might want to begin.

Rows will build up your back and shoulder muscles and prime your upper body for all those pull-ups you’ll eventually be doing.

Rows can be undertaken using a sandbag, dumbbells, barbell, kettlebell, heavy medicine ball, even just a duffel bag filled with books or heavy objects. 

Dumbbell back rows. Pull Up progression. Upper body exercises. Back exercises. Lat workouts. Shoulder exercises. Arm exercises.
Dumbbell back rows, a good place to start as you build up you upper body strength.

To complete a back row:

• Stand with one foot on a floor, one knee on the bench.

• Squeeze your abs and bend over slightly with the dumbbell in one hand. Prop the other hand on the bench to support yourself.

• Pull your shoulders back and bring the dumbbell toward your ribcage at a moderate pace.

• Return to starting position and repeat.

2. Inverted Body Rows

  • Position yourself lying down underneath a dip bar so your chest is level with the bar and your feet on the ground. 
  • Position your body under the dip bar holding the dip bar with both hands and arms fully extended.
  • Pulling your shoulders back, raise your chest toward the dip bar as far as possible.
  • Lower back down and repeat.
Pull Ups. Upper body exercises.Back exercises. Lat workouts. Shoulder exercises. Arm exercises.
Find a trim trail or bars in a childrens play area (go first thing so angry mom's don't chase you away!) and get to it!

Tip: If this is difficult for you, make sure to pull up as far as possible toward the dip bar and then slowly lower yourself down. You’ll build strength in the negative reps.

If you’re more advanced, you’ll want to straighten your legs.

3. Dead hangs

This pull-up progression exercise is designed to introduce you to hanging from the bar.

Simply grip the overhead bar and hang from it with arms fully extended. Hang for as long as is possible. This will build grip strength and core body tension

Dead hangs. Pull Up progression. Upper body exercises. Back exercises. Lat workouts. Shoulder exercises. Arm exercises.
Try to hang for as long as you can to improve your grip and upper body strength.

Once you can hold the exercise for 10+ seconds begin training for flex hangs to continue your progression to pull-ups. 

4. Flexed Arm Hangs

The next progression is the flex hang.  This is a static bar hold, which involves simply holding yourself at the top of the pull-up exercise with your chin over the bar.

Flexed pull up holds. Pull Up progression. Upper body exercises. Back exercises. Lat workouts. Shoulder exercises. Arm exercises.
Like the Dead Hangs, try to keep the hold for as long as possible.

Once you can hold the flex hang position for longer than 10 seconds you are ready to start training with negative pull-ups.

5. Negative Pull Ups

Negative pull-ups essentially involve performing only the lowering phase (the eccentric portion) of the pull-up exercise. 

Use a box to bring your chin over the bar. Attempt to control your descent and maintain good form. Start with 10-second negatives for 8 sets. 

Negative Pull ups. Eccentric Pull ups. Pull Up progression. Upper body exercises. Back exercises. Lat workouts. Shoulder exercises. Arm exercises.
Undertaking negative pull ups with assistance from a personal trainer.

When you can extend one negative rep to 10 seconds, you should possess the strength to move onto the next level.

6. Leg Assisted Pull Ups

Pull Up progression. Upper body exercises. Back exercises. Lat workouts. Shoulder exercises. Arm exercises.
Don't be tempted to 'cheat' with these and become over reliant on the legs. Focus and utilise the upper body muscles as much as possible.

The next step in building your upper body strength is pull ups using the feet on the ground to decrease the resistance.  There are two ways this can be achieved, either. a) Find a far low enough for you to keep your feet on the ground whilst getting your chin over the bar. b) Position a barbell at a height on the rack that allows the same result.

You will be pulling up to the bar (using the legs as little as possible).  Concentrate on the upper body muscles (back, lats and shoulders) undertaking all of the work. The legs are on the floor merely for stability and to reduce some of the resistance. 

As you develop strength you can progress to single leg assisted pull-ups.  This is essentially the same technique, however, only one leg will be on the floor supporting.

7. Jumping Pull Ups

Once you’ve built up some upper body strength consider the jumping pull up.

You will essentially be undertaking full pull ups (especially the negative portion in the controlled descent).  The difference is that you will be pushing up (lightly) from the ground to assist with the movement.

The whole purpose of this is to get used to the motion of pull ups.  As well as to build strength on the controlled descent of the pull up.

Jumping Pull ups. Pull Up progression. Upper body exercises. Back exercises. Lat workouts. Shoulder exercises. Arm exercises.

Use the jump to provide momentum on the ascending part of the pull up.  Build strength on the eccentric lowering part of the pull up.

How to undertake a Jumping Pull up:

  • Stand with a pull up bar directly above you.
  • Lightly jump and pull your arms toward the bar so that your chin ends up over the bar.
  • Try to ensure that the upper body does the majority of the work as opposed to the propulsion from the jump.  The jump is just used to assist with momentum, not to actually complete the movement. Light jump only!
  • In a controlled manner, slowly lower yourself back toward the floor until your arms are fully straight.
  • Repeat.

Tip: If the jumping portion of the pull up is still too difficult for you, simply put a box or a chair underneath and reach the pull up bar that way.

8. Resistance Band Pull ups

Resistance bands are a cheap and effective method used to gain strength and continue with pull up progression. They essentially work by offsetting your bodyweight to allow you to get in more reps and increase strength faster.

The bands are available in various sizes and thickness to help support body weight and make pull ups possible. You can use any resistance band that you like (as long as it can support your weight).

Resistance band Pull ups. Pull Up progression. Upper body exercises. Back exercises. Lat workouts. Shoulder exercises. Arm exercises.

Resistance bands, a cheap and effective way to improve your pull up ability. Go for lighter bands as your strength increases.

There is little point in using a band that allows you to undertake pull ups with ease however.  Try to select a band where you are challenged undertaking the pull ups for 10 reps.  If this is too easy you need a band that will provide less assistance.  Don’t cheat yourself! Concentrate on getting the movement correct.  Once you can undertake 3 x 10 reps with relative ease then it is time to decrease the resistance.  Either go to a lighter band or progress to the next stage. 

How to complete a band assisted pull up:

  • Stand with a pull up bar directly above you.
  • Loop the resistance band over the top of a pull up bar, then thread one end through the other and pull to secure.
  • Grab onto the pull up bar with one hand on each side of the band.  Then put a knee or one or both feet in the bottom of the band.
  • Starting with your arms fully straight, pull yourself up to the bar so that your chin ends up over the bar.
  • In a controlled manner, lower back down.
  • Repeat.

Tip: If the bar is too high to easily put your feet in the band, use a chair or a box to get situated.

9. Kipping Pull ups

If you are familiar with CrossFit you may be aware of ‘kipping‘ pull ups. A kipping pull-up uses the momentum created by the core and lower body to assist with what is normally an upper body movement. This momentum generated by the hips, core and legs assists in propelling the body up to the bar. As a result, this drastically decreases the force production required of the upper body to get up to the bar.  Arguably (don’t say this to a Crossfitter!) the more momentum you create with the lower body, the easier the movement becomes.  So in effect you should be able to do more reps.

However, don’t be fooled into thinking that because of this assistance, that a kipping pull up is somehow an easy thing to undertake.  The kipping pull up is a skill within itself and can be very tricky to perfect.  They require more work from additional muscle groups than a regular pull up (shoulders, lats, arms, hips, and core).

For myself when I was starting out with pull ups, a CrossFit friend showed me how to do these.  At the time I struggled to undertake more than three or four pull ups.  Kipping allowed me to undertake more whilst I built up my upper body strength.

Advantages and disadvantages of kipping:

  • For people who participate in CrossFit competition the kipping pull-up is a valuable addition.  CrossFit values efficiency in movement, anything that allows them to fire off more reps whilst reserving energy/reducing fatigue.  The kipping pull up is a great boon in CrossFit competition that allows them to continue for longer periods.  It also lets a CrossFit athlete undertake the pull ups quicker whilst fatiguing the upper body much less.
  • With a good kipping technique using a powerful hip snap that creates upward momentum, the actual amount of upper body pulling is greatly reduced. Again this is great for a CrossFit athlete looking for a high number of fast pull-ups. However, this will not overload the upper body in the same way regular pull ups will.  If you are looking to bulk up the upper body the kipping pull up is not as effective as a regular pull up.
  • For regular non-CrossFitters the Kipping pull ups can still be a valuable addition to workouts, even after you are able to undertake regular pull ups.  They can be utilised in the same way as drop sets or negative reps at the end of a workout of regular pull ups.  Once the upper body has been overloaded and fatigued, use kipping to squeeze out a few additional reps.

How to do a kipping pull up:

  • Hanging from a bar, push your shoulders and chest forward.  Tighten your leg and core muscles to fix your legs in position as your chest, hips, and core move forward. Your body should now be curved with chest and abs pushing forward and legs and arms further back (the arched position).
  • Pull your shoulders backward to reverse the move and change the curve of your body. Essentially, as soon as your chest fully extends outward then start to swing your body backwards.  Engage the shoulders and arms to pull your chest backward, whilst bringing the hips back at the same time to form another curved shape with your lower back pushing behind you (this concave appearance is known as the hollow position).
  • Swing backwards and forward in this manner for 2-3 times to gain some momentum. Repeating the above motions, switching between the arched and hollow positions whilst keeping muscles tense.
  • After 2-3 swings, when you return to the hollow position you will prepare for the lift in the next ‘swing’.  Simultaneously pull down on the bar with your arms whilst lifting your knees slightly to prepare for the ‘hip pop’ in the next step. Momentum generated from the arched position is used to assist in getting the chin up and over the bar.
  • Pull yourself up on the next movement. As you move backwards into the hollow position, raise the knees slightly again except this time ‘pop your hips’ open quickly.  This is to assist in driving the movement and to help propel yourself up and over the bar. Popping your hips is driving the hips backwards to generate extra force for the movement (imagine clenching your butt as you undertake this).  Using that momentum, pull up with your arms until your chin is over the bar.  Continue the pull up until your chin is just above the bar.  The timing of arm pull/knees up/hips open will drive you up to the bar.
  • Pause for a second at the top before beginning the lowering part of the exercise.  Then push yourself away a couple of inches away from the bar (to avoid catching chin on the bar! Ouch!) and begin to lower yourself back down.  Tense your muscles and extend your arms whilst lowering yourself.  As you reach the starting position, flow into the next rep by pushing out your chest and starting the movement chain again.
  • Repeat.

The ‘kipping’ pull up. Part of CrossFit’s repertoire.  

NB: I am not a CrossFitter, and have merely taken advice from participants in CrossFit in how to undertake the move.  If you seek proper advice in how to undertake the move then it is best to seek a CrossFit trainer who can advise you on technique and how to correct faults.  Again, for myself I found them great assistance in developing upper body strength and building up to pull unaided pull ups.  I still utilise kipping pull ups to this day.

Tips:

  • Start off slowly. Do remember kipping pull ups are a skill within themselves.  Whilst you are getting used to the physical requirements of the exercise, concentrate on technique.  Scrutinise the video (below) and have a friend record you or observe you as you undertake them.  Look at your technique and find strengths and faults.  Keep your number of reps low initially until you become competent in completing the move. This will reduce the risk of injury until you have perfected the technique.
  • Use smaller swings initially and only progress to larger swings once you are competent. Larger kipping swings demand more force and effort from your body. To avoid the potential of injury, keep the movements light and progress slowly. Get it right before you start going crazy with the effort.  Allow you body time to adapt to the requirements of the exercise.
  • Don’t depend just on momentum to move you during this exercise. The move requires a high degree of muscle coordination to prevent injury. Keep your muscles engaged and concentrate on all the stages of the exercises throughout.
  • A good kipping pull up should be controlled by your shoulders and core, not your legs swinging back and forth at the hip.
  • Avoid this exercise when you are very tired as you will be more tempted to depend on the momentum to propel you.
  • Study the technique of Cross-fitters on YouTube, have a friend critique your technique until you get it right. Practice makes perfect.

10. Chin ups

(To clarify on the differences between the a ‘chin-up’ and a ‘pull-up’) Chin-ups require you to grab the bar with palms facing towards you (aka the supinated position) using an overhand grip.  Alternatively, pull ups require you to grip the bar with the palms facing away (pronated position) or using an underhand grip. 

Now that that is clear, what are the advantages of undertaking chin ups prior to attempting pull ups?  Chin-ups are one of the most challenging body-weight exercises, indeed the late Charles Poliquin described them as’ the squat of bodyweight exercises’.  The main benefits of the exercise include increasing strength and hypertrophy of the arm muscles (biceps) as well as the shoulder and back muscles (posterior deltoids, teres major and latissimus dorsi).  Chin ups also improve grip strength, as well as helping correct posture and provide an improved physical appearance.  Furthermore, they can help strengthen the stabiliser muscles of the spine, thus reducing the potential for injury or chronic back pain. 

Chin ups. Pull Up progression. Upper body exercises. Back exercises. Lat workouts. Shoulder exercises. Arm exercises.
The chin up, a great confidence builder on the road to the pull up.

So the benefits of the chin up are clear, but again why use them on the road to pull ups?

The majority of people who undertake chin ups tend to agree that they are easier to undertake than pull ups (this includes myself!). This is primarily due to the assistance gained from the biceps muscles to pulling the body up to the bar.  Since they are (generally) easier to undertake than pull ups, they can be a great confidence builder on the road to achieving a full pull up. 

Muscles used:

  • Biceps.
  • Latissimus Dorsi.
  • Biceps brachii, brachialis, brachioradialis.
  • Teres major.
  • Posterior deltoid muscles.
  • Deep spinal stabilisers (transverse abdominis, lumbar multifidus and thoracolumbar fascia). 
Chin ups. Pull Up progression. Upper body exercises. Back exercises. Lat workouts. Shoulder exercises. Arm exercises.

Some of the muscle groups utilised whilst undertaking a chin up.

How to undertake a chin up:

  • Take an underhand (palms facing towards you) grip on a bar with hands approximately shoulder width apart. Grip the bar firmly and hang on the bar with your elbows fully extended.
  • Retract and depress the shoulder blades to limit movement in the shoulder girdle throughout the exercise, this will help prevent injury. Brace your core for the movement.
  • Using your arms and upper body, pull up your body until your chin is above the bar. Your elbows should be in full flexion (elbows bent).     
  • Using slow and controlled movement, lower yourself back down. Ensure a complete range of movement and continue this movement until the arms are once again fully extended.
  • Repeat.
  • Keep tension on the back, shoulders and biceps throughout this moment and engage the core throughout.

11. The Main Event

Pull ups. Pull Up progression. Upper body exercises. Back exercises. Lat workouts. Shoulder exercises. Arm exercises.
The main event and everything you have been training towards. The almighty pull up.

The main event, what you have been training for.  Technique is everything here, it is better to undertake five good full pullups than thirty poor ones (where you could also potentially injure yourself!)  

Ensure you are vigilant with your technique, use mirrors, training partners, videos, anything that will help you correct your form.  

If your technique is off, stop and go back a few stages.  Keep drilling yourself until you get it right.  

How to undertake a pullup:

Pull ups. Pull Up progression. Upper body exercises. Back exercises. Lat workouts. Shoulder exercises. Arm exercises.
Muscles utilised with the pull up.
  • Hang suspended from the bar using an overhand (supinated) grip (palms facing away from you).  Shoulder width apart.
  • Ensure your spine is straight with your head looking forward.
  • Using the upper posterior chain muscles (Back, arms, shoulders and Lats) pull your body vertical until your chin/upper chest is aligned with the bar.
  • Return to the start position by lowering the arms in a controlled manner using the aforementioned muscle groups.
  • Repeat.

Tips:

  • A wide grip will hit the upper lats, and the closer the grip, the more the lower lats are recruited. 
  • Use full range of movement. No half pull ups! Ensure you extend the arms as far as possible when returning the movement to the start (you are just cheating yourself otherwise. 
  • Technique is everything. Try to ensure you follow the movements in a fluid motion without compromising your form).

If you have enjoyed our Pull Up Progression post please share or feel free to comment below 🙂

Related Posts

Our Other Posts

About Post Author

Leave a Reply

This site uses Akismet to reduce spam. Learn how your comment data is processed.

error: Content is protected !!